

February 10th, 2023
10 Basic Date Formulas in Power BI DAX
Date formulas and functions are very useful in Power BI and serve as the basis for conducting high-level analyses like month-over-month or year-over-year calculations. Therefore, having a solid command of the basic date formulas and functions in DAX is essential. The focus of this article is to give a detailed overview of some of the basic date formulas frequently used when working with data that involves a date field.
Power BI DAX comes with a set of powerful date functions. The following date functions will be demonstrated in detail with supporting images to make it easier to follow along with this article.
- DAY
- MONTH
- QUARTER
- YEAR
- NOW
- TODAY
- DATE
- DATEDIFF
- CALENDAR
- CALENDARAUTO
Click here to download the Power BI workbook containing all the formulas demonstrated below. Here’s the dataset link for you to download and practice yourself.
DAY
The day function in DAX takes a date input and returns a number between 1 to 31. The number represents the day of the month. For instance, when the date 01/29/2022 is passed to the DAY function in Power BI, it returns the number 29.
Syntax
DAY function in Power BI DAX has the following syntax:
day = DAY(<Datetime>)
Demonstration
The dataset shown in the image below will be used for demonstration purposes. Here’s the dataset link for you to download and practice yourself.
First, open the dataset in Power BI.
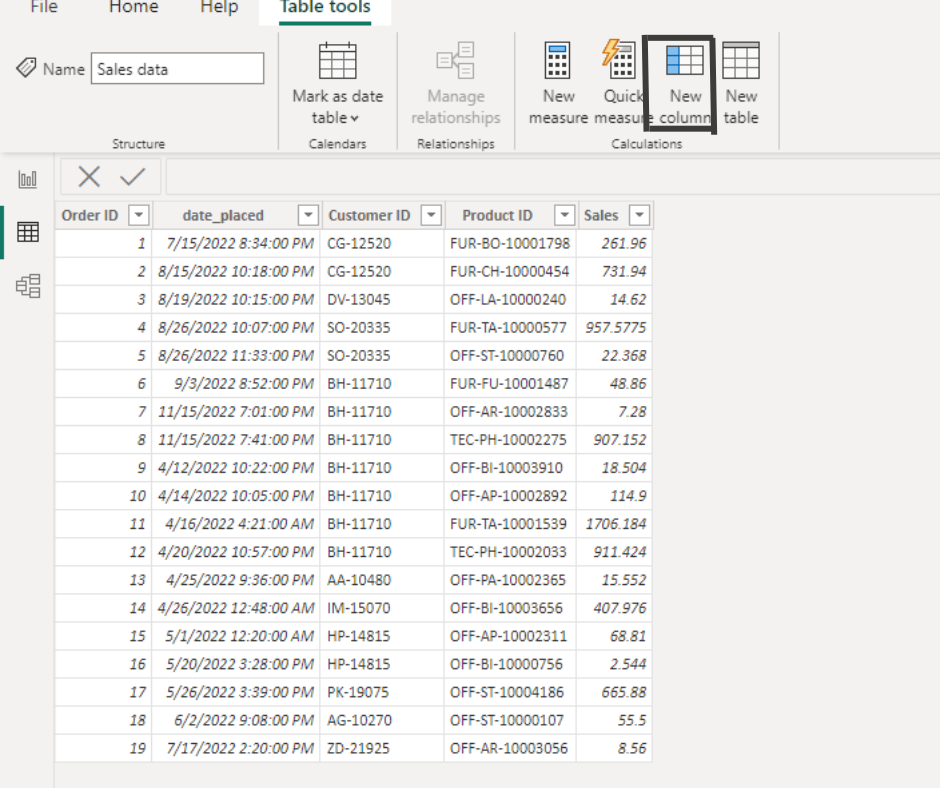
The dataset contains a date_placed column.
Click on the New Column at the top to open the query editor.
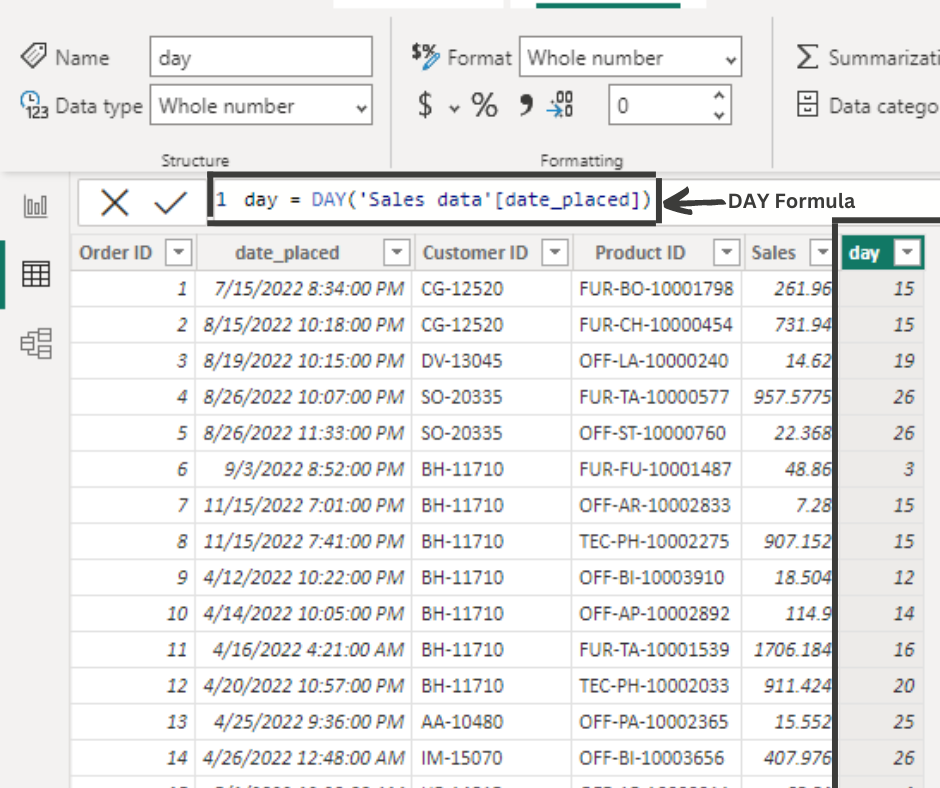
Enter the following formula into the query editor:
day = DAY(‘Sales data'[date_placed])
Hit enter to see the newly created day column that contains the number of a day in a month.
MONTH
The MONTH function in Power BI DAX takes a date input and returns a number between 1 to 12. The number represents the month of the year. For instance, when the date 01/29/2022 is passed to the DAY function in Power BI, it returns the number 01.
Syntax
MONTH function in Power BI DAX has the following syntax:
month = MONTH(<Datetime>)
Demonstration
Click on New Column to open the query editor.
Write the following formula in the query editor and press enter.
month = MONTH(‘Sales data'[date_placed])A new column named month containing the month number of the year is added to the dataset.

QUARTER
The QUARTER function in POWER BI DAX takes a date input and returns a number from 1 to 4. The number represents the quarter of the year that the input date falls into. The quarters’ breakdown is given below:
- 1: (January – March)
- 2: (April – June)
- 3: (July – September)
- 4: (October – December)
If the function returns 1, the date falls between January to March. If it returns 2, the date falls between April to June, and so on.
Syntax
QUARTER function in Power BI DAX has the following syntax:
quarter = QUARTER(<Datetime>)
Demonstration
Click on New Column and write the following formula into the query editor:
quarter = QUARTER(‘Sales data'[date_placed])
Press enter to see a column with the quarter number for each date entry in the dataset.

YEAR
The YEAR function in Power BI DAX takes a date input and returns the year in a date. The data type of the new column containing the year is an integer. For instance, when the date 01/29/2023 is passed to the YEAR function in Power BI, it returns 2023 as an integer.
Syntax
YEAR function in Power BI DAX has the following syntax:
year = YEAR(<Datetime>)
Demonstration
Click on New Column to open the query editor.
Input the following formula into the query editor and press enter.
year = YEAR(‘Sales data'[date_placed])
A column named year containing the year of the input date will be added to the dataset.

NOW and TODAY
The NOW and TODAY function in Power BI DAX returns the current date in DateTime format. Both functions have no parameters or inputs. The only difference between the two functions is that NOW is precise and returns the accurate time with the date, whereas TODAY always returns 12:00 AM with the date.
Syntax
The syntax for NOW and TODAY is as follows:
current_date = NOW()
current_date = TODAY()
Demonstration
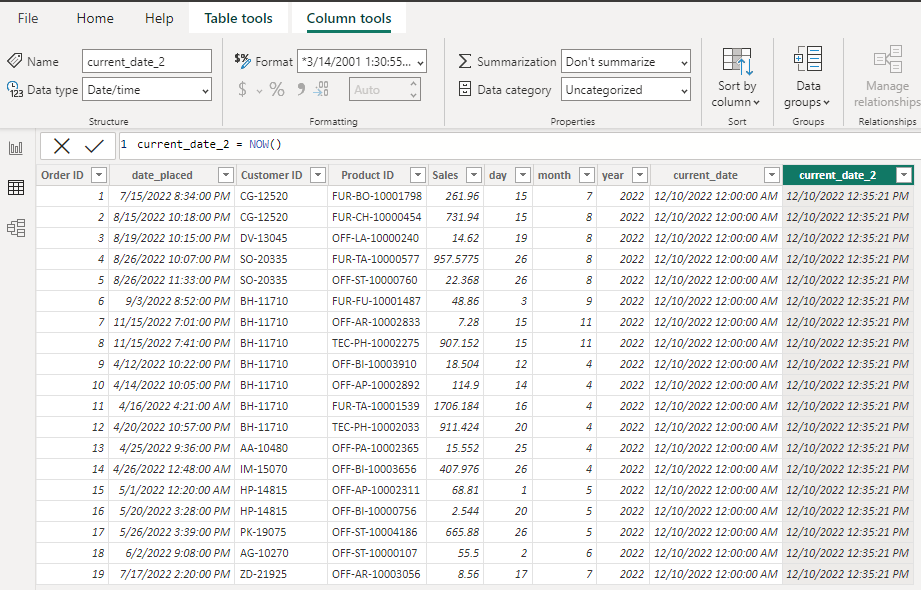
Click on New Column at the top in Power BI and enter the following formulas into the query editor:
current_date_1 = TODAY()
current_date_2 = NOW()
Two new columns named current_date_1 and current_date_2 will be added to the dataset that contains the current date and time.
DATE
The DATE function in Power BI DAX takes three input parameters and returns a single DateTime value as output. The input parameters should represent year, month, and day.
Syntax
The syntax for the DATE function is as follows:
date = DATE(<year>, <month>, <day>)
Demonstration
In the demo for DAY, MONTH, QUARTER, and YEAR, we split the date_placed column into three columns. Using the DATE function, we’ll combine the days, month, and year columns into a single DateTime column.
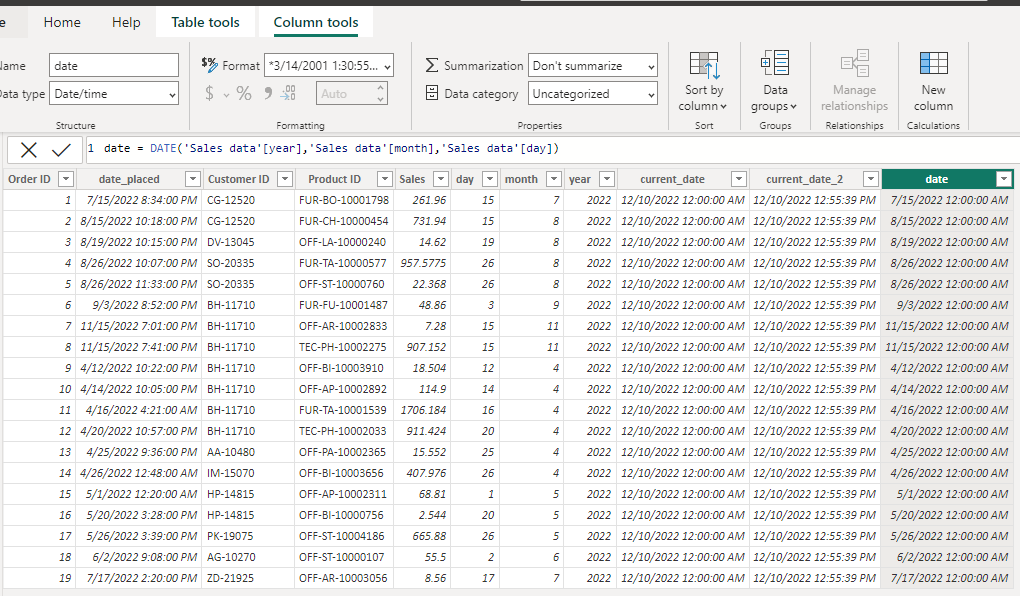
Click on the New Column at the top and enter the following formula into the query editor:
date = DATE(‘Sales data'[year],’Sales data'[month],’Sales data'[day])
A new column named date will be added to the dataset containing a single DateTime value.
DATEDIFF
The DATEDIFF function in Power BI DAX calculates the difference between two date values. The difference can be in terms of seconds, minutes, hours, days, weeks, months, quarters, and years. It takes three input parameters:
- Start Date
- End Date
- Interval (HOUR, DAY, etc.)
Syntax
The syntax for DATEDIFF in Power BI is as follows:
diff = DATEDIFF(<start date>, <end date>, <interval>)
Demonstration
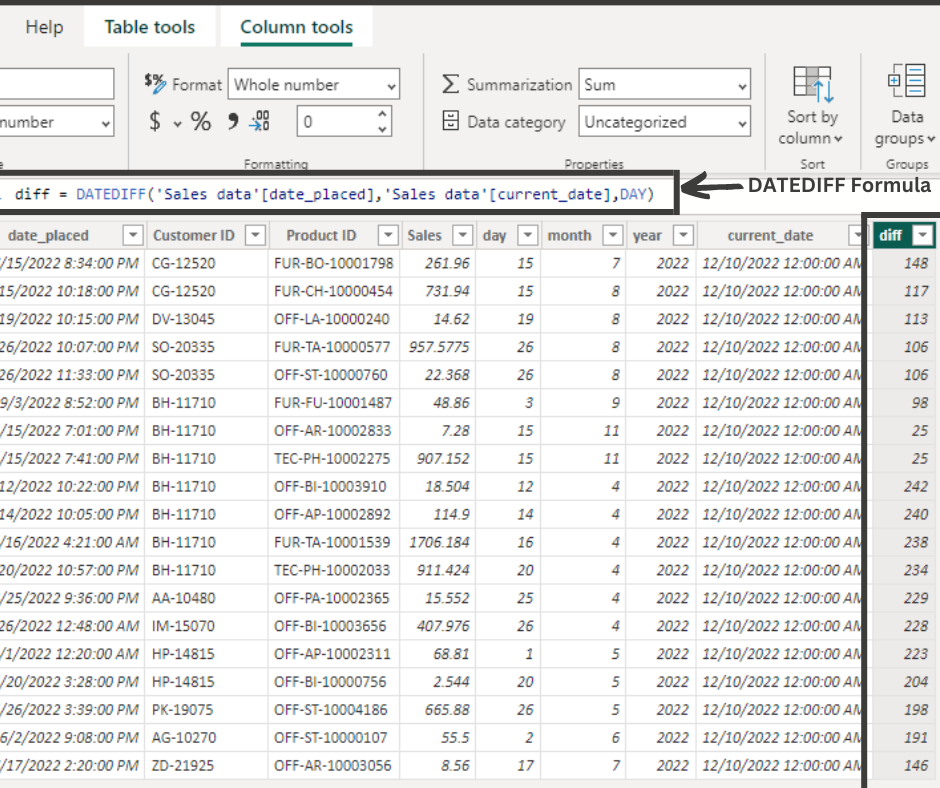
Previously, we calculated the current date using the NOW function. Using DATEDIFF, we can calculate the difference between the date_placed and current date columns.
Click on New Column and enter the following query into the query editor:
diff = DATEDIFF(‘Sales data'[date_placed],’Sales data'[current_date],DAY)
This line of code will calculate the difference between the two dates in terms of days.
CALENDAR AND CALENDARAUTO
The CALENDAR and CALENDARAUTO functions return a new table containing dates; however, the main difference between the two functions is that the CALENDAR function returns a table containing dates between the start and end dates specified in the formula. In contrast, the CALENDARAUTO function automatically returns a new table, taking the dataset’s start and end date.
Syntax
The syntax for the CALENDER function in Power BI is as follows:
calendar = CALENDAR(<start date>, <end date>)
It takes two parameters as input and returns a table containing a range of dates between the start and end dates.
The syntax for the CALENDARAUTO function in Power BI is as follows:
calendarauto = CALENDARAUTO([END of Month])
It takes one optional parameter as input which is a number from 1 to 12 indicating the end of the month of a fiscal year, and returns a range of dates automatically from the dataset.
Demonstration
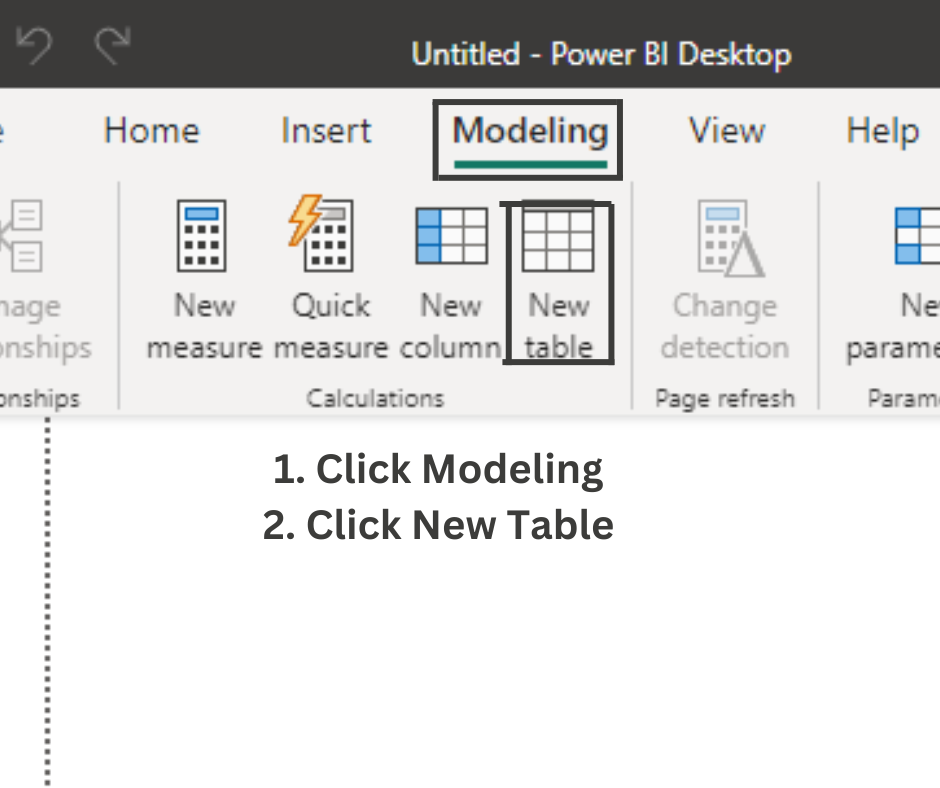
Go to the Modelling pane in Power BI, and click New Table to open up the query editor.
Write the following formula in the query editor and press enter.
calendar = CALENDAR( DATE(2022,01,01), DATE(2022,12,30) )
We’ve passed January 1st, 2022, as the start date and December 30, 2022, as the end date to the CALENDAR function. It returns a table with a range of dates between the two input dates.

Click on New Table again, and write the following formula into the query editor:
calendarauto = CALENDARAUTO()
The CALENDARAUTO function saves you time by automatically finding the start and end date from the dataset and creating a table with a range of dates between the two dates.

Click here to download the Power BI workbook containing all the formulas demonstrated above.